Following the majority of the clean up (see Part 1), we began with attempting to move some railroad ties from one side of the barn to the other so we could begin the stalls, however we quickly learned that the majority of them are frozen to the ground still. As a result, we had to adjust the order of intended tasks so we decided to shift our focus to the standing stall conversion first.
We made quick work of one standing stall that we simply wanted to use for storage. Within a matter of minutes, my husband had the hay manger removed and we were pretty much finished with it. The manger took up a fair bit of space within the stall; space I deemed valuable for storage of bales, tools, shavings and a wheelbarrow.
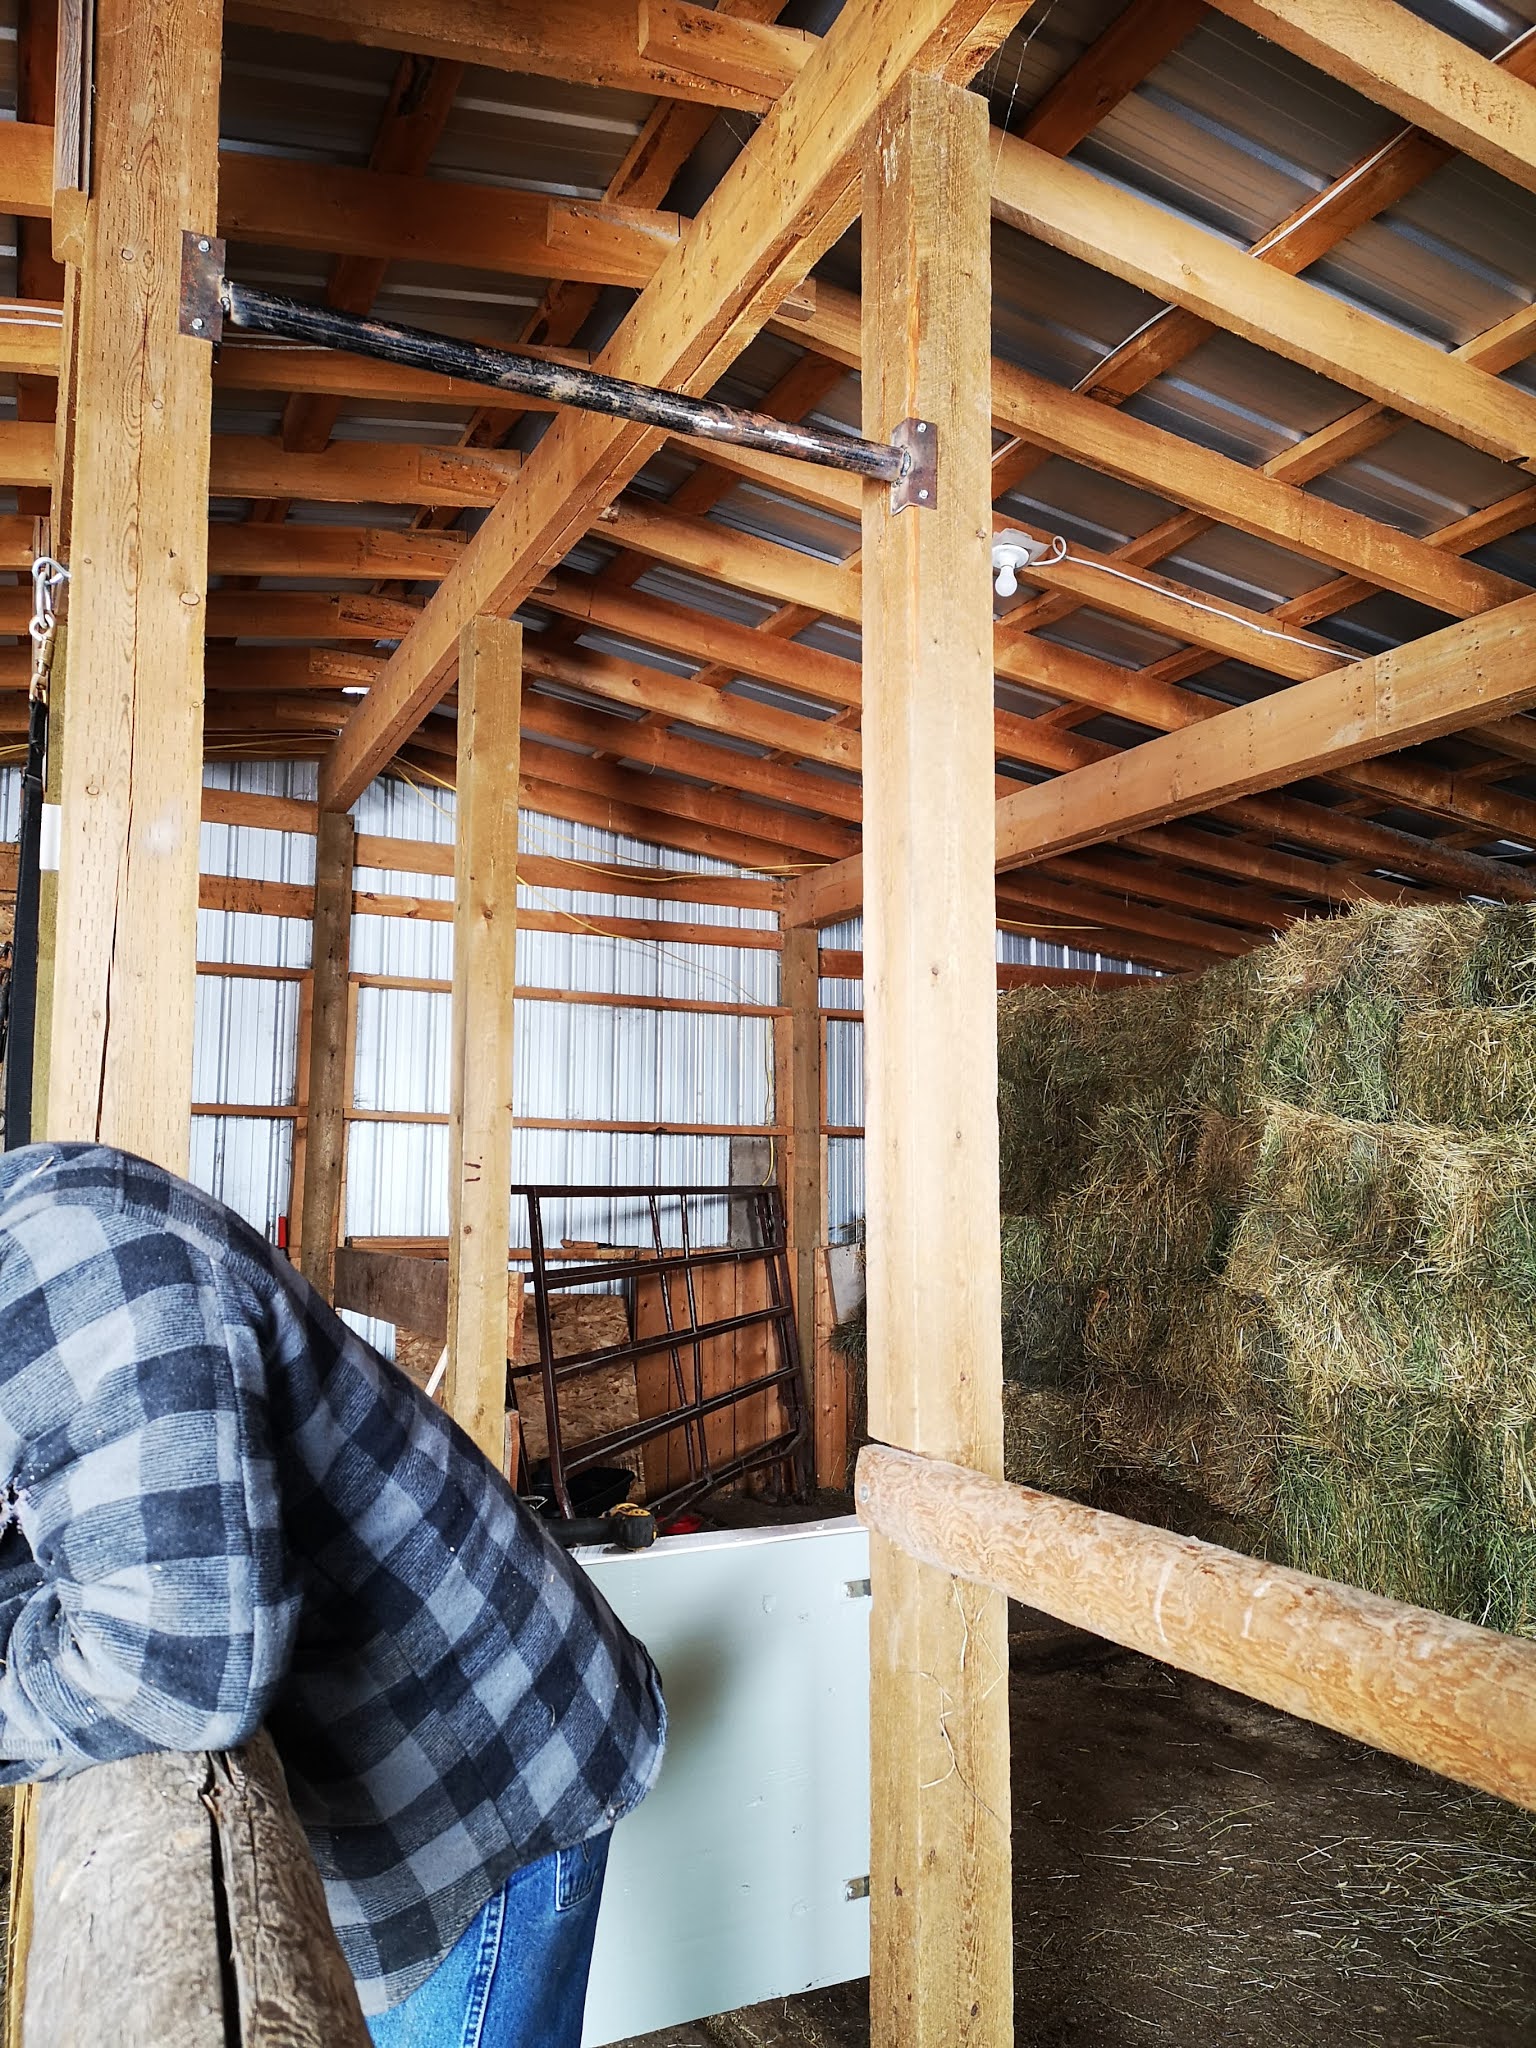
The other standing stall however, we are converting into a stock which is taking a fair bit more work. It's currently also acting as a storage area for some wood and things, so we decided to begin with building the kick plate as we could do that without relocating the wood currently stored within it.

We settled on 3/4" Plywood, which we later decided to double-up making it just over 1" thick for good measure. I knew I wanted the kick plate to be entirely removable, so I left it to my hubby to design how that would work. He settled on what he calls hinges and I call "the holey things", with bolts that act as pins and drop down into them. This allows us to remove the 2 pins from one side and have it swing one way or the other, or remove all 4 pins and completely remove the kick plate in a matter of seconds. Due to the nature of plywood, we put a strip of puckboard over the top to protect it from the undeniable amount of fecal matter that will cover it, as I worry it will seep down between the layers. Saying that and knowing full well it's going to get covered in poop whenever used for reproductive work, I also wanted it to match the future stall fronts because... yanno, matchy match n' all that.


I waffled for a few days on paint colours. I scowered the internet, and asked random people online for examples but didn't find very much. I knew I wanted things to look bright and airy (stupid with horses, but hey, what can I say) so I decided on a shade of grey that looked nice with white, pine and a dark olive green (details on that later). I bought the paint and got started with it in the tackroom since it's about +5C in there, and I quickly decided I didn't like the colour. I waffled on changing it, but friends encouraged me to keep going and I relied on how good the paint chips looked together in the star.
After much thought, I concluded that the thing I liked the least is that I was dumb and bought it in flat so it was a very matte colour, and it looked awful in my tackroom lighting. When I pulled it out into the barn after the first coat, I still hated it but decided to carry on. I did a second coat, then I put a semi-gloss clearcoat over top to get rid of that matte-effect that I wasn't loving. The glossiness will make it easier to wipe down, plus it will match the white trim.
After the second coat, I still didn't love it, but I didn't hate it enough to change it so I trusted the process and kept going. The grey paint dried really fast, but after what felt like 1,000 years to cut out the trim pieces for the 'X', I learned the high gloss white paint I selected dries significantly more slow as it's a high gloss paint.
I was still questioning myself clearly, but once in place with a piece of white puckboard leaning up against it, I had a glimpse of what I saw in the store, and hoped for the best once it all came together.
The following day, I went back out and the white trim was still wet, but I was getting impatient. I gave it a few more hours, then my hubby and I ventured outside while Eowynn took her morning nap and got to work on the stock conversion. As soon as we got the white trim up I was in absolute LOVE with the colours and I'm so glad I kept going with it because it looks fantastic!
My father in law was putting puckboard up in his new stalls, so we snagged a piece he had trimmed off which worked perfectly for the top of the kickplate. When doing anything rectally such as ultrasounds, there is a lottttt of poop, and it inevitably will fall onto the beautiful kickplate. As such, I wanted it to overhang a little, so it worked out wonderfully.


I love the look of the traditional dutch doors (ie the X) and our stalls will match, however... holy sh!t those suckers are hard to cut out properly and have match up (clearly). We are far from talented carpenters (though my husband would beg to differ, I'm sure) but hey, it's our own and I'm sure by the time we do 8 more we'll be pro's!
I also installed a ring that will allow me to clip tails to in the future, to keep them out of the way when doing Artificial Insemination. The area to the right of the stock in the photo above is where my cross ties are, so there is already a bridle hook there incase I need to hang something up out of the way!
Following the creation of the kickplate, we moved onto designing the chest bar. I wanted the chest bar to be completely removable incase we want more space, but I also wanted it to be adjustable depending on the size of the horse and what we're using it for. In the stock I currently use at my in-laws, I mostly use two different positions for the chest bar depending on the mare, so having something that was fixed in place didn't seem suitable to me.
When my husband, who lovingly said "it's all your ideas, i'm just making sure it gets done properly and no one gets hurt with power tools", asked me where I wanted the chest bar, I honestly had no idea. I've never taken the time to measure the one at my in-laws, so I did the easiest thing I could imagine - I walked out to the pasture and caught Sierra to use as a measuring stick. She's never been in the standing stall, or in stocks (to my knowledge), but she was perfect as could be and was more interested in cookies or napping. Occasionally, her boyfriend whinnied for her, which made for cute photos.
My high tech measuring system - a horse and a broom.
Hubby hard at work while I take pictures, as per usual.
She provided him with excellent instruction, clearly.
The model, demanding more treats for all her hard work of sleeping and standing around.
Once we had our measurements, I took Sierra back out and we returned to our parenting duties until Eowynns afternoon nap, and then headed back out to the barn to get the stock conversion finished!
We made quick work of the chest bar, even though it's not exactly a bar at all. Regardless, it's a very simple design, with more "holey things" and some threaded ready rod. I wanted something I could easily remove in a bind, and could be quite adjustable. My husband created it so that if we flip the board around, it changes the position of the bar and there are two separate brackets, which allows me to adjust it to four different settings within 12" of each other. Given the direction of my breeding program, which is the majority of the reason for a chest bar, I suspect any future broodmares to be roughly the same size as what I have now, so I think it should work well.
The final steps for completing the Stall to Stock conversion took a little fabricating from my husband. This stock will not be used entirely for reproductive work, so I also wanted to put a steel bar between the two posts, so we could back horses into the stock and hoist their head up for dental work and any other needs.
My wonderful husband also wanted to build a simple mount for my ultrasound machine, but it's not exactly a priority for me right now, as I can easily use a cart or make him hold it for me (hehe).
I'm pretty excited to have the first tiny portion of this major project relatively complete, but I think there will be a bit of a lull between this post and the next part of this series, but there will be more and I can't wait!


You seem to be really enjoying this! And I would be too. That looks great
ReplyDeleteTicking things off the list - yahoo!
ReplyDeleteI love the color you chose - can't wait to see more of the renos :)
I like using the horse to measure ;) It works!
ReplyDelete